Runout Measurement
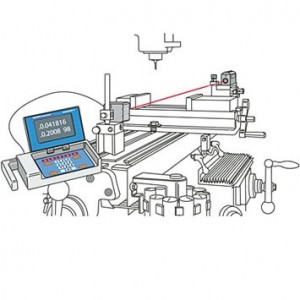
Measuring runout on moving equipment and machine tools is easily performed with the Laser Microgage.
How it works
The laser beam forms a straight reference line that is aligned to the axis of travel for a stage, machine tool slide, moving head, or similar translating part. A Microgage receiver is secured to the moving stage or slide so that it is carried along the travel path.
Readings are taken at specific points along the motion of the moving stage or part and runout and travel variations show up as reading variations on the Microgage display. Using the interface option with Pinpoint Capture and a laptop or PC allows many readings to be taken quickly for plotting small travel variances and runout.
Typical runout measurement applications
- Checking runout on CNC mills and lathes
- Monitoring travel straightness on actuators and rams
- Measuring runout on printer and scanning heads
- Checking travel straightness on gantry systems
- Minimizing runout on X-Y stage and slide travel
- Monitoring runout in robotic arm travel
- And other runout and travel applications
Products Needed
Useful Accessories
- DCU Computer Interface & Capture Software
- 4 Axis Precision Mount
- 90-Line Right Angle
- Precision Tripod Mount
Find your solution here
Not sure which laser alignment product is right for your job? Get expert advice from our engineers, contact us today.


