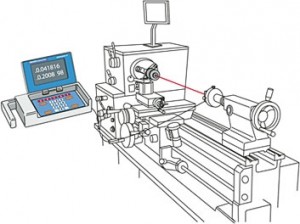
Rotating machinery needs to be properly aligned in order to run efficiently and produce quality parts. This machinery relies on two opposing spindles, or a single spindle and an opposing tool, that are on opposite sides of the part and are often used for boring, milling, and other similar operations. Lathes and turning centers have a chuck and a tailstock that periodically need checking and alignment. When a lathe is misaligned, the chuck might not be in alignment with the tailstock and the travel of the cutting tool holder resulting in parts that are cut with an angular error or taper. This is the result of a cutting tool that is moving on an axis that is no longer parallel with the centerline of the chuck that is holding the rotating work piece. Even if an operator suspects an alignment problem with a boring mill or a lathe or a spindle machine, they might not bother to measure the error because it takes too long.
Avoiding the issue and “hoping for the best” reduces the quality of any part that is manufactured. A better approach is to use a laser alignment tool to ensure proper alignment of spindle equipment and lathes. Using laser alignment equipment is a fast and convenient way to align spindles and lathes and doing so will improve manufacturing efficiency and profits. Typical lathe alignment applications include checking and aligning the chuck on lathes and turning centers, positioning and adjusting opposing spindles, aligning the tailstock, aligning the travel for cutting heads and tools, measuring alignment of boring mills, positioning and adjusting precision bar feeders, and many other industrial applications. Laser alignment equipment will provide information on runout, centerline offset, parallelism, concentricity, and other useful parameters. An operator can then guide machinery back to optimal alignment which will improve the end product and profits.
To measure lathe alignment, a cylindrical laser is used. The laser transmitter is round and placed into a chuck or in the collet or bore of the spindle so that the laser beam is projected along the rotational centerline of the machine. The dual-axis receiver is secured to the tool holder, tailstock, or mounted in the bore of an opposing spindle to catch the laser beam. The operator then goes through a series of simple steps by turning the laser transmitter and then turning the receiver, and taking readings that show if the spindles or the lathe head and tailstock are parallel to one another and aligned. Alignment can be measured over short or long distances. Simple onboard software provides useful information about errors on the machine and how to fix them.
Information provided by the laser alignment equipment can be used to re-align the machine itself or to apply correction factors for future production runs.


